Pages

Saturday, January 28, 2012

How to see Venus in daylight

Venus is so bright that it is visible in full daylight, and looks as a white bright day on the blue sky. It is more easy to see Venus when it is far from the Sun, and less affected by its glare. Follow these instructions to see Venus in the day. First of all make sure that the sun is blocked by a building or a tree. The Sun light is very strong and it will make the task of finding Venus much harder.
  1. Try to see Venus immediately at sunset. This should be quite easy. Remember the spot  that you are stand in and make references to other visible items such as buildings or trees. Stand in the same position a day after but 20 minutes before sunset and try to locate Venus a little up and to the east from where it was a day before. Do so for several days, each time a little earlier.
  2. Use the moon to locate Venus. At least once a month the moon is close to Venus. Find the moon first. The moon is much larger than Venus. and is it easier (Although may require time as well) to find it. After finding the moon try to locate Venus. Use maps or internet sites (such as heavens-above) to find out where Venus is relative to the moon.
  3. Use binoculars to locate Venus. Safety first, make sure that the sun is completely blocked and that you can not accidentally look directly at it through the binculars! Although Venus is bright, It will not appear through binoculars if they are not focused properly. In order to use binoculars, focus it beforehand (In the evening before) on Venus and make sure that the focus does not change. Now the binoculars are focused and you can use them to see Venus in the day. After you find Venus through the binoculars, try to see it without them
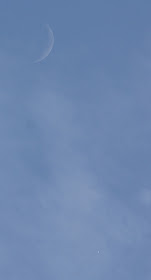


In this photo, Venus is so bright it is seen through the thin clouds.
Venus in daylight
Venus in daylight

Tuesday, January 17, 2012

Sun reflection makes building look like it is on fire

From far away it seems that the building is on fire!
Building on fire?
Building on fire?
But there is no need to worry. This is only the sun's reflection which in a specific angle creates this illusion. The sun was very low in the sky, barely minutes before sunset, which explains the dominate red and orange colors. The building is about 7.5km from the camera and covered with glass and this is how it looks. The appearance of the building changed every minute, as the sun moved in the sky, but the best reflection was from the moment that the sun was exactly opposite the building.
Zooming out, the building still seems on fire.

Is it burning?
Is it burning?


But zooming further our it is now clear that it is only a reflection

Reflection of the sun

And this is how it looked
Sun Reflection
Sun's Reflection


Monday, January 16, 2012

Lightning Photography

How to photograph lightning?

What an astronomer do during the winter? Photographing lightnings of course. Lightning's photography was once a difficult task which is much eased these days due to digital photography. In order to photograph lightnings, You have to put the camera in a protected area from the rain and aim it into they sky where the lightnings are. Of course a lightning exact position is known only after the lightning occurred, so it is recommended to use a wide lens (as wide as possible) which will cover a larger area of the sky. The area covered by the camera shall include the minimum artificial light.  Most digital camera are suitable for lightning photography. Mount the camera on a steady tripod, set the camera for long exposures, 10-30 seconds, and hope that a lightning will happen during that period and area of the sky. Make sure that the aperture and ISO values of the camera are adjusted so the photo will not be too white from any artificial light such as cars streetlamps or even the sky-glow.
If your camera supports this feature, you can use the BULB setup in which the camera shutter is closed only when you release it. To use this option you must use a release cable or remote control since you do not want to touch the camera and vibrate it while it is shooting the photo.
Using such a cable will give you the option to sit indoors in the warmth of your house while the camera is working outside for you. Just make sure that the camera is protected from rain  and put a protection filter on the lens as well.
Before the digital photography era, you could use the same technique (many long exposure) or buy a specail light detector which triggered the camera when it detects sudden light. It was harder, inconvenient and with greater cost.

Another option is to take a video movie for a long time. After that, you can edit the video, cut the parts that has no lightnings, and even extract single frames from the video. When doing so you can see how the lightning evolve, frame after frame. We recommend to try both methods simultaneously with two cameras! Good lightning storms are not very common and may occur once or twice a year.


Also be ready for many disappointments. You will see many lightning but by the time you setup the equipment it will stop, or get far away making just light patches in the sky without details. Your timing may be incorrect. the camera might catch only the end of the lightning, etc. Nevertheless once in a while a terrific photo will come out! share it with us.

Friday, January 13, 2012

Orange Moon Rising

Looking at the rising moon is a great experience! The rising moon has a different appearance than a regular "high in the sky" moon. There are two noticeable differences:
  1. The moon looks much larger, even as 2-3 times as it seems later at night.
  2. The moon color is not white, but orange or even red.
Rising Orange moon
Orange moon about 12 minutes after it rises.

How to observe the rising moon
No special equipment is required besides your eyes. However, in order to see the large and red moon it is best to view it as soon after it rises as possible. There are many places where you can check when the moon rises in your area (it varies for different latitudes) for example use the heavens above site. Also make sure that no buildings or mountains block the view in the required direction.  After you find a nice location from which to observe, just wait for the moon to rise and observe its color and size.

Why does the moon look so large?
This is a very old question but even today there is not a full explanation for this. The moon of course in not really larger when it rises, quite the opposite. The moon's distance from the observer is larger when the moon rises than during the night (add the radius of the earth), and the moon is actually about 1.5% smaller! You can test this with your camera. Take a picture of the moon when it rises and when it is high in the sky and count the number of pixels (make sure that the same focal length or zoom is used in both pictures). There will be a slight difference, but even if you don't see the difference you will see that the size is more or less the same and that the large moon illusion is indeed an illusion.

Another known method to measure the moon size is by taking a small coin (a dime usually) and holding it in front of your eye with a straight arm. The coin will completely cover the moon. Try different coins with different sizes. Try it when the moon is low and when the moon is high and you will see that the coin covers the moon at the same distance from your eyes which means, again, that there is no size difference.

The "Large moon illusion" has been known for hundreds of years and even Ptolemy mentions it and tries to provide an explanation. The explanation he gave is partially correct. The moon seems to be large because our brain compares it to other low objects such as trees or mountains. Since we know the moon is much larger than the tree the brain interprets it as being large. However, even looking through a tube at the moon, it will still look large even when there is no other object to compare to. Also the direction of your gaze influences this phenomenon. Try either one of the following: try laying down on your stomach and then raising your head, or try to bend down and look upside-down at the moon and see for yourself what happens.

Why is the orange moon or red moon?
The moon is red because of the earth's atmosphere. It is the same reason why the sun looks red when it rises or sets. The atmosphere scatters most of the moon's light (which is the reflected sunlight) but not the red light which has the longest wavelength. The distance that the moon's light travels through the atmosphere is  greater when the moon is low in the sky. When the moon is higher the light is not scattered so much and the moon seems to be white.

Note: The moon will look red and large also when it sets. So make sure to check the moon set hour and location as well if it is more convenient to observe.

Thursday, January 12, 2012

The Venus Transit of 2012

What is the Venus transit?
The Venus transit means that an observer on earth sees Venus pass directly in front of the sun. This requires that Venus be exactly between the Sun and the Earth and also that Venus will be on the same plane as the Sun-Earth plane. While generally all planets are on the same plane, there are small differences which makes the Venus transit very rare. 

The next Transit of Venus will be at June 6 2012, and will be visible (at least partially) from most of the world. Venus transit is quite rare and there are only 4 passes in 240 years, usually in pairs of two transits within eight years (The last transit was in 2004). Maybe several of the young readers will be able to see the next transit (2117 in case you wonder), but for most of us it is a remarkable chance to observe this interesting phoneme.

Safety is required. Although the transit is similar to a partial lunar eclipse, there are major differences. Venus apparent size is much smaller than the sun, so Venus blocks only a small portion of the sun. During the transit it will not get any colder or darker and if you do not know that there is a transit you will not be able to notice it at all.

To View the transit you will need special equipment. Never look directly at the sun with your eyes or with an optical device. Do not use old films, dark glasses or even welder glasses. The best method is to use special solar eclipse sunglasses. They are not expensive, buy several for family and friends and use them. You will see a small dark circle on the Sun.

Also check your local astronomy club association. The Venus transit is a major events, so many clubs will open their gates and give the public the chance to view the transit through a telescope. Even if you do have your own telescope and binoculars, don't use them since viewing the Sun requires special equipment.


Sunday, January 8, 2012

The movement of the planets

What are planets? Planets are moving stars. While most of the stars are fixed in the sky rotating as a whole unit and never changes their location relative to each other, the planets are different and may appear in different places in the sky, not the whole sky but rather a thin band which is called the Zodiac. From very ancient times, people notice that there are 7 stars which move, and the Greeks called them planets (which mean wanderers). These ancient 7 "classical planets" were the Sun, the Moon, Mercury, Venus, Mars, Jupiter and Saturn. Earth of course was in the middle of the universe, still and not moving, and Uranus and Neptune too faint to see.
Today there is a formal definition of planets, There are exp-planets (Planets orbiting stars other than the sun), and many planets has planets of their own (moons). However, Planet is still moving in the sky and it is very easy to observe this movement with your own eye just like our ancient predecessor thousands of years ago.
To observer the movement of the planets you will need to identify them. It is not hard since planets are quite bright, being easily noticed in the sky (especially Venus and Jupiter), and also because they are not part of any constellations in the zodiac. If you have troubles try using software such as stellarium or applications for you iPhone or Androids mobile devices. In order to see the movement you will have to choose a reference start, a bright star which is close to the planet and you can measure the distance between them.
The planets which are closest to the sun, Mercury and Venus are moving fast. However Mercury is hard to find so leave it alone. Jupiter and Saturn moves slow so it takes at least two weeks between observations to see noticeable change.
The following photos present Jupiter and Mercury near one of their conjunctions. I used Jupiter as a reference star to demonstrate the movement of Mercury. Jupiter is also moving but in a period of 5 days its movement is negligible. Let's start with the photos. Jupiter is always the left dot and mercury is seen much below it.

Jupiter and Mercury
Jupiter and Mercury day 1

After a day Merucry is still below Jupiter.
Jupiter and Mercury
Jupiter and Mercury day2

After another day, Merucry and Jupiter are almost at the same height. The photo was taken in twillight so it may be hard to see both planets which appears as pale white dot. Try to enlrage the photo to see better.
Jupiter and Mercury
Jupiter and Mercury day3

After another day Mercury is higher than Jupiter.
Jupiter and Mercury
Jupiter and Mercury day4

And after another day, Mercury is much higher than Jupiter.
Jupiter and Mercury
Jupiter and Mercury day 5
After another day Mercury and Jupiter were too far to take a photo together.

Thursday, January 5, 2012

How I killed Pluto - Mike Brown

If you are older than 15, you probably learned at school that the solar system includes 9 planets. This was not always the case. In ancient times there were only seven. Seven is a good number. It is a meaningful number as there are seven days in a week. Earth was the center of the world and did not count while the Sun and the Moon did. During and after the Copernican revolution the number changed quite often. Earth become a planet but the sun and moon were deleted from the list. Then came William Herschel and discovered Uranus, then came Adams, Leverrier and Galle predicting and finding Neptune. Meanwhile more large objects were found in what's now called "The Asteroids' belt" (Ceres, Palas, Juno, Vesta) and for some time they were also counted as planets and finally Clyde Tombaugh found Pluto in 1930 making a nice (but meaningless) number of 9 Planets. Then come Mike Brown and on his pursuit to find  the tenth planet actually killed the ninth.
Mike Brown's story is detailed in his book "How I killed Pluto and why it had it coming". Well Pluto is not to blame for anything. It is just there, but Mike managed to write a story which is a great mix of: history, biography, science, philosophy and even a thriller. A thriller you might ask? Yes, chapter nine is written as a thriller and describes how private observational data was exposed on the Internet and might have been used by other researchers to get first credit for Mike's discovery (I can't resist to compare this case to James Watson and  Francis Crick who used Rosalind Franklin's data without her knowing about it to get the breakthrough they needed in their DNA research). In this chapter you will also read Mike's philosophical thoughts about science, why and when some observations must be kept secret, and why others must not.
The story reaches its climax when the International Astronomical Union (IAU), in 2006, decided what is a planet (and thus deciding if Mike discovered new planets or the opposite, reduced the number of planets by removing Pluto), and although Mike had much more to gain as a planet discoverer, he strongly felt that Pluto should not be a planet. If you need someone to blame for Pluto's fate, Mike is a good choice, and occasionally he gets a number of complaints on this issue. However, even though Pluto is not a planet, it is still important, as the rest of the distant objects out there, since their existence requires new theories about the creation of the solar system itself and Mike relates to this subject throughout the book.
As you read, you will enjoy the story, as it goes from Mike's early childhood to that of his daughter, Lilah. You do not have to be an astronomer to enjoy the book (although it helps). However, as an amateur astronomer I liked the fact that Mike is also an observer. Mike isn't just a researcher, looking through telescopes (and the biggest ones - Keck and Hubble)  and at thousands of pictures of the sky to find new planets (sorry, not planets but "dwarf planets"!). Throughout the book Mike shows us what it is to observe, he describes how much he loves to watch the moon and the planets. The book ends with Mike describing the conjunction of Venus Jupiter and the moon. It happens from time to time and I remember hosting a star party to share this experience with people from my community. Also, Mike gives a good explanation about naming the new objects he finds, and although the meaning of Haumea, Makemake, Eris and Sedna is known and written in many places, the reasoning behind giving these names is detailed in the book.

Mike's Internet site

Mike's video lecture about how he killed Pluto 

How I Killed Pluto and Why It Had It Coming